Friday, March 7, 2008

Plate Envy: Il Fornaio Gives It Away

Restaurants live or die on their repeat business. To bring their customers back again and again, some rely on exceptional food and personalized service, others try affordable prices and a pleasant setting. Il Fornaio adds another element to the equation.

For two weeks each month, all 21 branches of Il Fornaio ("The Baker") feature recipes from a different region of Italy: Fruiuli-Venezia Giulia, Lazio, Puglia, Liguria, Abruzzo, Scilia.... The dishes illustrate that region's distinctive ingredients and cooking styles. Nothing can compare with actually going to Italy and having a great meal, but when we want a delicious, affordable Italian dinner, it's great to be able to visit the nearby Il Fornaio in Santa Monica. The restaurant is devoted to all things Italian. Not only are the meals an effort to give you the experience of dining in Italy, each month you'll receive a uniquely Italian gift.

Pick up a "Passaporto" during the Festa Regionale and you'll be given a gift: packages of cannellini beans or hand-made pasta, arrabiatta spices, specialty olive oils, balsamic vinegar, loaves of bread, calendars, olive bowls, and, my personal favorite, dinner plates.

Have your Passaporto stamped each month and on the sixth visit, you'll take home a dinner plate, hand-painted with a distinctive image of Italian life.
For more posts about Il Fornaio's Festa Regionale check out:
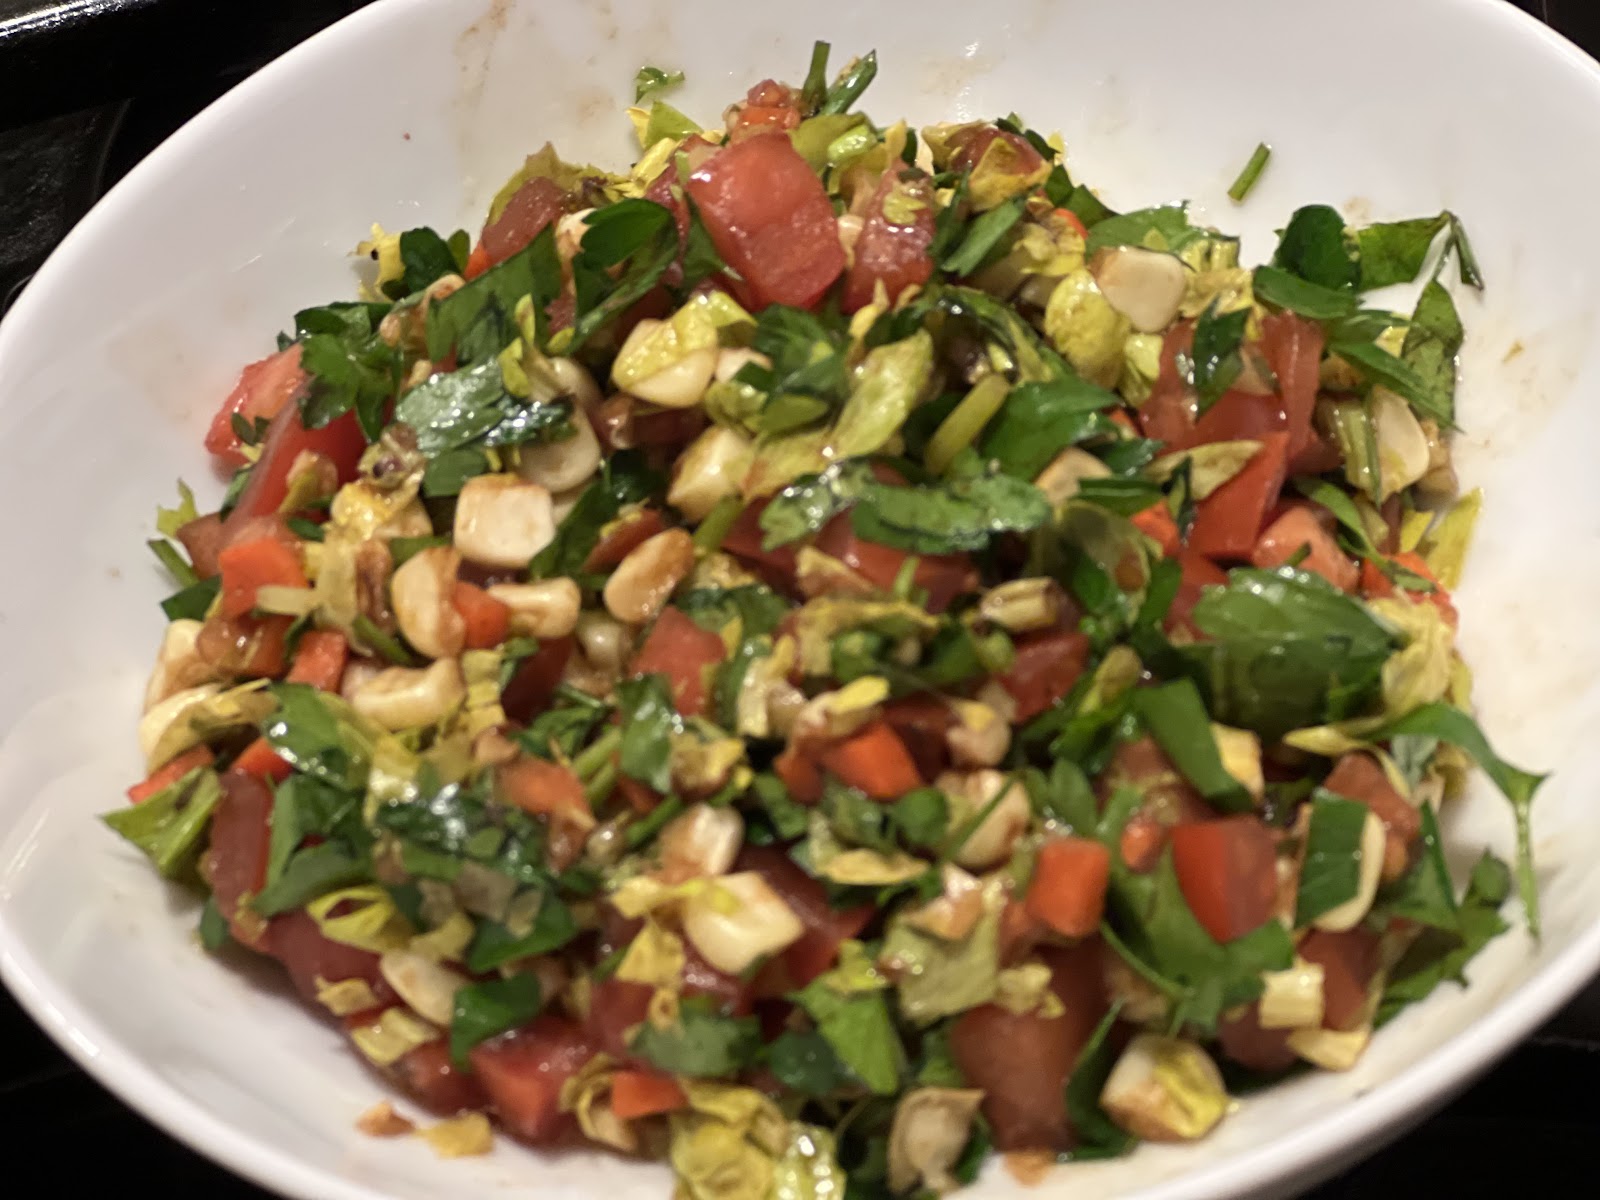
Grilled Vegetable Couscous Salad
A Tasting at Il Fornaio, Santa Monica--Trentino-Alto Adige
A Trip to Italy is Just Around the Corner at Il Fornaio--Calabria
Il Fornaio Heads South to Campania for May's Regionale
Il Fornaio Heads North to Lombardia
Abruzzo at Il Fornaio, Santa Monica
Il Fornaio Serves Up a Recession Busting Tasting Menu - Piemonte
I am obsessed about those plates. Something about them makes me so happy. To make certain we'll get the new ones, we go to the restaurant every month. So far, we have more than 60 and are several Passaporto away from being completely out of shelf space.

The plates are great, but so are the gifts that help us practice cooking Italian meals at home. Last month we were given packages of fagioli cannellini with a Tuscan recipe by Il Fornaio's Executive Chef Maurizio Mazzon. I added roasted tomatoes and spinach to his Fagioli All'Uccelletta recipe.

Cannellini Beans with Roasted Tomatoes and Spinach

If you want to serve cannellini beans, you have to plan ahead. Before they can be cooked, they have to be soaked overnight. Cooking takes time as well, so this is a great weekend project. Since they keep well in the refrigerator, the beans can be quickly reheated for a weekday meal and served with a grilled chicken breast, steak, or tuna fillet.

Yield 6-8 servings

Time soak beans overnight, 2 hours to cook

Ingredients

2 cups cannellini beans
½ celery stalk, washed
½ onion, peeled, washed
5 garlic cloves, peeled
1 carrot, washed, peeled
18-20 sage leaves, washed, torn into pieces
5 tomatoes, washed
1 bunch spinach, washed thoroughly, stems removed, roughly chopped
Olive oil
Freshly ground black pepper
Sea salt

Method

Soak the beans overnight with 5 cups of water. Drain. In a large pot, put the beans and 10 cups of water, 1 teaspoon of sea salt, the celery, onion, 2 whole garlic cloves, and the carrot. Cook on a low flame for 1 hour or until the beans are al dente. Drain, but this time save the water. Discard the vegetables.

Pre-heat the oven to 350 degrees. Cut the stems out of the tomatoes, put them on a baking sheet lined with a Silpat sheet or a piece of tin foil, sprinkle sliced garlic on top, season with sea salt and black pepper, then drizzle with olive oil. Bake for 1 hour. Let cool. Put the tomatoes in a bowl. Take off the skins and discard. Tear the tomatoes into small pieces. Set aside.

In the large pot, sauté 2 finely chopped garlic cloves in 2 tablespoons of olive oil until lightly browned, add the sage and sauté for a few seconds, then add the roasted tomatoes with their juice, the cooked cannellini beans, the chopped spinach, and 5 cups of the reserved water. Bring to a low boil and cook for 30-45 minutes until the sauce thickens.

Serve with a grilled or roasted meat.

For more posts about Il Fornaio's Festa Regionale check out:
Grilled Vegetable Couscous Salad
A Tasting at Il Fornaio, Santa Monica--Trentino-Alto Adige
A Trip to Italy is Just Around the Corner at Il Fornaio--Calabria
Il Fornaio Heads South to Campania for May's Regionale
Il Fornaio Heads North to Lombardia
Abruzzo at Il Fornaio, Santa Monica
Friuli-Venezia Giulia at Il Fornaio

Wednesday, March 5, 2008

A Surprise at the Farmers' Market: Six Oysters, Two Appetizers, One Stew

Michelle checked the refrigerator and all we needed from the Wednesday Santa Monica farmers' market was a romaine lettuce. She handed me the list before I left. Usually when I go to the Wednesday market, I only have a few minutes, but the day wasn't that busy, so I didn't have to rush. I checked with the farmers I usually go to for lettuce, but there must have been heavy rains when the romaine was picked, because the ones I saw were pretty ragged and muddy.

I have to confess, whenever I go to a farmers' market, I buy more than I intended. The flowers are always amazing, even in the winter and the vegetables are so inviting. By the time I'd walked around the market, I'd filled my bag with anemones, Italian parsley, a bunch of carrots, a bag of Haas avocados, and Yukon potatoes. I even bought baby onions and fresh mustard greens because they were too cool to pass up, even though I didn't have a clue what I'd do with them.

Leaving the market I saw that a new vendor, Carlsbad Aquafarm, was selling baskets of fresh mussels, oysters, clams, and red seaweed. Fresh oysters at a reasonable price are always hard for me to resist. The Catalina Oysters looked like the Gulf oysters I had years ago when I worked on an oyster boat near Galveston. I bought a dozen.

When I got home, excited about having oysters for lunch, I unpacked what I'd gotten from the market and realized an awful truth. I'd forgotten to buy the romaine. 'Guess I got distracted.

I've described how to shuck oysters in an earlier posting. It's not difficult, but it does take some practice. Prying open the first plump, beautiful oyster, I discovered a benefit of buying them fresh-from-the-ocean. As I cut the oyster loose, nectar filled the shell. Six oysters opened over a bowl and I had a cup of nectar. Today had turned into a day of improvising. My lunch now had an added course: oyster stew.

Eating good food makes me happy. I must have learned that from my dad. When I was a kid, I remember watching him come home from work and sink down into his leather chair. My mom had the routine down cold. Within a few minutes she'd bring him a plate of appetizers. Happiness for him was a pre-dinner feast of pickled herring with sour cream and onions on pumpernickel bread, a plate of thinly sliced radishes with salt, a jar of baby shrimp in cocktail sauce, and a Seven & Seven on the rocks. The only part of his menu held onto was a love of cocktail sauce.

I tried the raw oysters a variety of ways: with a squeeze of lemon juice, a little taste of caviar left over from my Home Alone dinner, with finely chopped baby onions, with chopped avocado, and with cocktail sauce. I ate the oysters with slices of French bread and a couple of Nabisco saltine crackers.

6 Oysters Serves 1. Preparation Time: 10 minutes.

Traditional Cocktail Sauce

1 cup ketchup
1 tablespoon capers
1 teaspoon soy sauce
½ teaspoon grated horse radish
¼ teaspoon freshly ground black pepper
¼ teaspoon freshly squeezed lemon juice
Pinch of cayenne

Mix all the ingredients together. Put a small amount on top of each oyster. The recipe makes enough for several servings. Keep the sauce in the refrigerator in a sealed jar.

Salami With Avocado

When I had finished prepping the oysters, I realized I hadn't used half of the avocado. I could have easily made an arugula and avocado salad, but an appetizer seemed more satisfying. There was some felino salami from Bay Cities in the refrigerator. A piece of avocado, dredged in olive oil with sea salt and black pepper, placed on a slice of the salami, topped with finely chopped scallions and reduced balsamic vinegar and I had a delicious compliment to the oysters.

Oyster Stew

This dish is a freebie. The nectar gives the stew its flavor. Since I was eating raw oysters, I didn't need any in the stew, but you can certainly add them if you want.

1 cup oyster nectar
½ cup homemade chicken stock
½ carrot, washed, peeled, finely chopped
½ Yukon potato, washed, peeled, finely chopped
1 large shallot, peeled, finely chopped
1 garlic clove, peeled, finely chopped
½ cup Italian parsley, finely chopped
1 piece of bacon or 1"piece of sausage (Italian or Cajun), finely chopped
1 tablespoon sweet butter
1 tablespoon cream
Freshly ground black pepper
Olive oil
2 tablespoons homemade croutons

Two quick notes. The stew doesn't need any added salt. The oyster nectar has all the saltiness you'll need. The vegetables should be finely chopped as you would with a mirepoix.

Sauté the vegetables and bacon/sausage in the olive oil, seasoned with black pepper. After they're lightly browned, add the pat of butter, the oyster nectar, and the chicken stock. Simmer for 15 minutes to combine the flavors. Taste the potato for doneness. If you've decided that you'd like to have some oysters in the stew, add them at this point and simmer for 2 minutes. The oysters can be cooked whole or cut up if they are larger than the size of the soup spoon. Add the cream and simmer 2 minutes. Top with a tablespoon of croutons just before serving.

Serves 2. Preparation Time: 15 minutes. Cooking Time: 20 minutes.

Friday, February 29, 2008

Hidden Treasures at Tacos Por Favor in Santa Monica

Driving on the freeway, looking at the streets and neighborhoods below, I often wonder what fabulous restaurants I'm missing.Tacos Por Favor is one of those places that I had heard about for years, but had always driven by without stopping.

Today I decided to stop.

A cantina-sized Mexican restaurant on the corner of Olympic at 14th Street,Tacos Por Favor sits on the border between the two-Santa Monicas. It is well-known to the people who work in the auto repair and building supply businesses nearby as well as the students of the upscale private school, Crossroads and the well-heeled who could eat at the upscale Buffalo Club down the block, but prefer Tacos Por Favor's casual atmosphere and lower prices.

Long before it was hip, the restaurant made its reputation on the quality of its ingredients. Abandoning lard and searching out the freshest vegetables to make its salsas, Tacos Por Favor prides itself on serving "healthy Mexican food."

On this first visit, I tried a selection of the soft tacos: carnitas, chicken, cheese, shrimp, and the potato (delicious). One of the day's specials was shrimp soup. Six corn tortillas came with the large bowl of spicy soup, filled with whole shrimp, bell peppers, roasted red peppers, celery, and onions.

Delicious, filling, and affordable.

Stimulated by the flavors, I knew what I was going to make for dinner: carne asada with avocado and homemade salsa.

Carne Asada, Avocado, and Salsa

Instead of buying the meat at the supermarket, if you're close to a Mexican or Asian market, you'll find the cuts of meat you need at half the price.

Yield: 4 servings

Time: 30 minutes

Ingredients

1 pound flank or skirt steak, thin sliced
1 ripe tomato, washed, stem removed, chopped
1 carrot, washed, peeled, sliced into thick rounds
1 medium sized ripe avocado, washed, peeled, the pit removed, roughly chopped
1 tablespoon finely chopped yellow onion
1 teaspoon chopped cilantro leaves
1 garlic clove, peeled, finely chopped
1 small serrano chile, washed, cut in half, seeded
1 teaspoon fresh lemon juice
Mexican hot sauce or Tabasco
Olive oil
Sea salt and black pepper
6-8 large tortillas, corn or flour

Method

Marinate the steak in olive oil, seasoned with sea salt, black pepper, and a bit of hot sauce. If you have the time, overnight is great, but as little as an hour will help tenderize and flavor the meat.

Toss the carrot pieces and serrano chile in a bowl with olive oil and sea salt, then grill, 3 minutes on each side, remove and chop. Put them back into the bowl. Add the chopped tomatoes, onions, avocado, and cilantro. Mix well. Drizzle with the lemon juice and season with hot sauce, if needed. Marinate 30 minutes.

Grill the steak on a hot grill, 5 minutes on each side or until the edges are charred. Transfer to a plate, cover with a piece of aluminum foil, and set aside for 5 minutes.

Grill flour or corn tortillas and keep warm in a covered basket.

Roughly chop the steak, put the pieces into a bowl, pour the juices over the meat, and serve with the salsa and hot tortillas.

Variations

Grill 6 scallions--washed, ends trimmed--until charred and serve with the tacos

Grill 1 ear of corn--shucked, silks removed, washed--take off the kernels, add them to the salsa

Roast 2 garlic cloves in their skins over an open flame until their skins burn off, let cool, mince, add to the salasa

Add 1/4 cup finely chopped cilantro to the salsa

Wednesday, February 27, 2008

Trying Something New: Shrimp with Lemongrass

Today I spent an hour at Barnes and Noble browsing through the cookbooks. The ones that seemed most interesting to me featured cooking from Asia. Nobu and Masahara Morimoto have incredibly beautiful books about Japanese cooking. But it was James Oseland's Cradle of Flavor, with his account of cooking in Indonesia, Singapore, and Malaysia, that was most appealing. What I liked was his description of street-vendor food, full of flavor and easy to eat.

Years ago when I was experimenting with Vietnamese food, I planted lemongrass in the garden. I didn't use it very much, so the plant grew undisturbed until it had taken over most of the garden. Looking through the Asian cookbooks reminded me about all that lemongrass in the back yard. When I got home I cut off a stalk and came up with an incredibly easy to make shrimp dish.

Shrimp with Lemongrass, Garlic, and Bacon

The shrimp can be served with sliced avocado, steamed rice, pasta, or steamed vegetables.

12 shrimp, raw, washed, the shells removed and saved, deveined
1 garlic clove, peeled, finely chopped
1 piece of bacon, finely chopped
1 shallot, peeled, finely chopped
1 tablespoon finely grated, fresh lemongrass
2 teaspoons olive oil
1 teaspoon nam pla (optional)
Freshly ground black pepper
Sea
salt

In a small pot, boil the shrimp shells with 1 cup of water until the liquid is reduced to 2 tablespoons, then discard the shells. Marinate the deveined shrimp in olive oil, black pepper, and the grated lemongrass. For a Southeast Asian flavor use the the nam pla, otherwise sprinkle a pinch of sea salt on the shrimp.

Sauté the garlic, bacon, and shallot in the olive oil until lightly browned. Deglaze the pan with the shrimp liquid and reduce by half. Add the shrimp and the marinating sauce to the pan. Cook the shrimp no more than 30 seconds on each side. Serve with the sauce in a bowl.

Serves 2. Preparation Time: 15 minutes. Cooking Time: 5 minutes.


Tuesday, February 26, 2008

To Market, To Market to Buy Everything Fresh

Sundays in the Palisades, Wednesdays and Saturdays in Santa Monica, these are good days because that's when we go to the local farmers' markets. Most neighborhoods in LA have a farmers' market one day of the week. Southern California is blessed with a climate that allows us to enjoy dozens of varieties of fresh flowers and a wide selection of vegetables all year long.

My first experience with non-Southern California produce happened when I moved to Rhode Island. At the local supermarket, the produce section looked like a science experiment. The tomatoes were the worst. Most of them were pale green and trapped under a tightly sealed plastic wrap. I picked ones that had a reddish tinge, thinking they were more ripe. My friend informed me, knowingly, that the tomatoes were red because they'd been gassed. I was happy when I moved back to LA.

The summer will always have the best tasting produce, but what I saw at our local farmers' market this week looked great. For the easiest meal, winter or summer, lunch or dinner, nothing beats grilled vegetables, seasoned with olive oil, sea salt, and freshly ground black pepper.

Because vegetables take so little work to prepare, a feast is easily within reach: roasted tomatoes, grilled broccoli, carrots, eggplant and corn on the cob in the summer, steamed artichokes with melted butter. There is no more satisfying meal.

Grilled Vegetables

Cut the broccoli into bite sized pieces. Peel the carrots and cut them into slabs ½" x 1". Slice the egg plants in half. Husk and clean the corn on the cob, but leave them whole. For all the vegetables, the recipe is the same: drizzle them with a little olive oil and season with sea salt and black pepper, put them on a grill, and turn frequently.

Preparation Time: 15 minutes. Cooking Time: 20 minutes.

Steamed Artichokes

Delicious as an appetizer or a side dish, artichokes are healthy and easy to make.

2 large artichokes, washed
1 teaspoon Kosher salt
¼ cup sweet (unsalted) butter, melted

Trim the stem and snip off the sharp ends of each leaf with kitchen shears or household scissors. Put 2" of water into the bottom of a large pot. Put the artichokes in the pot on top of a steamer. Cover and cook on a high flame. After 30 minutes, use tongs to pull a leaf off one of the artichokes, and taste to see if it's done. If not, add 2 cups of water and cook for another 10 minutes, taste another leaf, and continue cooking until done.

Serve with melted butter and sea salt.

Serves 2. Preparation Time: 5 minutes. Cooking Time: 30-50 minutes.

Oven Roasted Whole Tomatoes

At the farmers' markets there are always vendors who want to sell their over-ripe tomatoes at half price, so you can buy a lot.

4-5 lbs. whole tomatoes, washed, stems and blemishes removed
4 garlic cloves, peeled, julienned
Olive oil
Sea salt
Freshly ground black pepper

Place the tomatoes on a baking sheet lined with a Silpat sheet, parchment paper, or tin foil. Put several garlic slivers in the top of each tomato. Season with sea salt and black pepper. Drizzle with olive oil and roast in a pre-heated, 350 degree oven for 1 hour.

1 tomato serves 1 person as a side dish with grilled chicken breasts, Italian sausages, or a steak.

Preparation Time: 10 minutes. Cooking Time: 1 hour.

Roasted Tomato Sauce

Peel off the skins and discard. If you want to use the tomatoes in a stew or as pieces added to pasta, tear them apart with your hands, collecting everything in a bowl. Save the liquid in the roasting pan. Some of that is the olive oil, but most of it is a flavorful, clear liquid given off by the tomatoes as they cook. Add the liquid to the bowl.

If you want a smooth, thick sauce, run the tomatoes through a food mill. You'll have a quart of high-quality tomato sauce.

Preparation Time: 15 minutes.

Pasta Sauce

To make a good pasta sauce, the liquid has to be reduced and flavor has to be added.

1 quart roasted tomato sauce
4 garlic cloves, peeled, finely chopped
1 medium onion, peeled, finely chopped
1 cup Italian parsley, washed, finely chopped
6 mushrooms, brown or shiitake, washed, thinly sliced
½ cup bacon, finely chopped (optional)
2 cups homemade chicken stock (optional)
1 tablespoon fresh oregano, washed, finely chopped
¼ teaspoon cayenne
1 teaspoon sugar (optional)
1 teaspoon olive oil
Sea salt
Freshly ground black pepper

Sauté the garlic, onion, parsley, mushrooms, and bacon (optional) until lightly browned. Add the tomato sauce, oregano, and cayenne. The chicken stock adds a sweetness and another layer of flavor, but if you want to stay meat-free, the chicken stock is optional.

Simmer for 30 minutes, stirring frequently to prevent the sauce from burning. Taste and adjust the flavor by seasoning with sea salt. Use the sugar if the sauce is too acidic. Stir and simmer another 30 minutes, then refrigerate overnight. Reduced, you should have 2 pints of sauce. When reheated, taste and adjust the flavors again.

The sauce will keep for several days in the refrigerator or weeks in the freezer.

Preparation Time: 10 minutes. Cooking Time: 75 minutes.

Where's the Beef? Tracking Down Free Range, Grass Fed, Hormone Free Beef

I like eating meat. But the recent, disturbing news report about downer-cattle coming into the food supply didn't engender confidence that what's available at local markets is always healthy. Being an alarmist doesn't help, but it's good to learn more about available alternatives.

One of the benefits of starting this web site has been hearing from people who email me recipes and their own food-stories. In response to my posting about buying affordable meat, a colleague from United Hollywood, John Jabaley sent in a note about his experience buying beef directly from an organic rancher. Here's John's account, together with his family's recipe for Bolognese Meat Sauce.

from John Jabaley:

We typically order every year and get a quarter of a cow for ourselves, sometimes just for ourselves and sometimes we'll split it with other families.

I found the farm around four years ago when my wife, Erika, read "Fast Food Nation" and asked me to read it as well. At the time she was a "fishetarian." Though I was mightily swayed by the book, I wasn't willing to give up beef. So I started looking outside the big food chain.

When you google it, it becomes apparent pretty quickly that there isn't enough rain in Southern California to raise free range grass fed, hormone free beef. Lake Tahoe and Northern California are the closest places that have enough space and rain to support that kind of ranching. Chileno Beef finally popped up after more searching than I thought would be necessary, so I called them. The owner, Mike, happened to be coming down to L.A., so we bought a quarter with another family. Two weeks later, I met him in the parking lot at the Tam O' Shanter in Los Feliz.

I brought 60 pounds of beef home, which raised some eye-brows, but Erika soon came to the decision that she wouldn't sit idly by as the kids and I enjoyed free range, grass fed beef. We were astounded by the difference. It is lean and actually has flavor, not so much as say bison or venison, but more than the corn fed hormone addled stuff you get at most grocery stores, and of course at a third of the price you pay for the same thing at Whole Foods.

We have bought as much as a whole steer, which we split with 3 other families. We all like the flavor so much, that one of the families wasn't getting through all of their allotment, so they split their quarter with another family. Because it comes frozen, the meat lasts quite a while, but if we were to buy more than a quarter for ourselves it would sit too long before we finished it. We have a separate freezer and it fills two shelves and half the door.

Since that first time, I started to drive up to the ranch to pick up the beef. It's a bit of a haul, since it's north of San Francisco, but worth the drive. Even adding in the cost of the gas and lodging, if you spend the night, you end up paying under 5 bucks a pound.

Another wonderful thing about the ranch is that Art Ibleto is the butcher. You pick up the meat at his place where he also sells all kinds of handmade pastas.

You have to be very careful with the roasts as there is not a lot of marbling, but they're delicious if done properly: rub them with olive oil salt and pepper, heat a cast iron skillet until it smokes, brown them, throw the whole thing in a medium oven until rare. The ground beef makes the most amazing Bolognese.

Bolognese Meat Sauce

1 lb. ground beef
3 celery stalks, washed, chopped
1 large onion, peeled, chopped
4 large carrots, washed, peeled, chopped
3 ½ cups roasted tomatoes, peeled, chopped or canned Italian whole tomates
1 6 oz. can Italian tomato paste
½ cup red wine
1 teaspoon olive oil
Sea salt
Freshly ground black pepper

Heat the olive oil, seasoned with sea salt and pepper, add the ground beef and crumble in the pan with a fork. Saute until browned, then remove and drain on a paper towel. Drain off excess fat. Saute the celery, onions, and carrots until browned, add the tomatoes, tomato sauce, and ground beef. Simmer on a low flame for 30 minutes. Taste and adjust the flavors.

If it's too thick, add the red wine. Come to think of it, add the red wine anyway. Continue cooking until the sauce is thick enough. Don't eat it the first night. Refrigerate it. It's better the 2nd day.


Wednesday, February 20, 2008

Ramen at Home, Quick and Easy

At some point in their lives, everyone eats Cup o' Noodles. They're so easy to make. Just pour boiling water into the styrofoam cup with it's nest of noodles and bits of dried vegetables, cover, and a minute later you have overly salted "soup" and mushy noodles. On a cold, drizzly day, that can be ok, but it's not a meal-of-choice. Ramen is a step up from Cup o' Noodles, but the same principle applies. Boiling water + instant noodles + "flavor packet" = soup and noodles with vegetables bits. Real ramen bears no resemblance to the packaged ramen in the market. In Japan, ramen restaurants are favorite neighorhood hangouts, usually with a counter and several tables. I've noticed that patrons in ramen restaurants don't do as much talking as they do in other kinds of restaurants. I think that's because the ramen is simply too delicious to want to talk.

People who love ramen get very obsessive about their noodles. The Official Ramen Homepage has hundreds of recipes for packaged ramen contributed by fans. Rickmond Wong is the ramen fan-extraordinaire. Profiled in the LA Times by Russ Parsons, Wong's web site rameniac.com gives a comprehensive survey of ramen restaurants in LA. Everyone has their favorite. Anne Lai sent me to Little Tokyo to try the ramen at Daikokuya (327 E. 1st Street, Los Angeles 90012, 212/626-1680).

A narrow passageway of a restaurant, Daikokuya is on the north side of 1st Street, half-way between San Pedro and Alameda. Of the half-dozen ramen restaurants on the block, only Daikokuya is packed with people at the tables and bar. Besides ramen, Daikokuya also has other traditional Japanese dishes: rice bowls, bento boxes, chicken teriyaki, mixed tempura, pork cutlet, sushi, and sashimi. But it's the ramen I came for, and while there are a dozen varieties to try, I wanted the specialty of the house: Daikoku Ramen, a large bowl of pork soup with noodles, fatty Kurobuta pork, a whole boiled egg, seasoned bamboo shoots, bean sprouts, and green onions.

I took my place at the counter and watched the cooks drop baskets of noodles into the large pot of boiling water. The customer to my right, Jason, could tell I was a first-timer. He helpfully suggested I add some of the minced garlic and pickled ginger condiments to the soup. A good call.

All the ingredients are delicious, but it's the soup itself that makes the ramen at Daikokuya so memorable. If you've seen the Japanese comedy, Tampopo, you know how hard the shop keeper struggles to perfect her pork bone broth. She has to work from early in the morning until late in the evening to get the flavors just right.

I like to adapt restaurant techniques to cooking at home, but while I love the broth, that's too much work for me. I'll use homemade chicken stock instead. What I do take away from Daikokuyo is the realization that fresh ingredients can turn a lifeless package of noodles into a sumptuously refreshing meal.

At home, ramen is quick and easy to make as long as you have a good supply of homemade chicken stock in your freezer. For the dried ramen noodles, there are hundreds of brands, flavors, and varieties. Try to find one that has the least amount of chemicals in their ingredients' list. Health Food stores sometimes carry packages of organic ramen. Almost any of your favorite fresh vegetables and cooked meats will work.


Ramen at Home
Yield: 1 serving
Time: 20 minutes
Ingredients

1 package ramen
½ carrot, washed, peeled, cut into thin rounds
½ cup broccoli crowns, washed, sliced
1 shallot, peeled, thin sliced
2 Italian parsley sprigs, washed, use only the leaves, whole or chopped
½ cup shredded chicken, cooked
2 cups homemade chicken stock
1 teaspoon scallions, washed, sliced into rounds, green and white parts (optional)
1 hardboiled egg, sliced (optional)
1 teaspoon sesame oil
1 teaspoon soy sauce

Method

Follow the directions on the package to make the ramen noodles, then drain them and set aside. In a small pot, sauté the vegetables and chicken in the sesame oil until lightly browned, add the chicken stock and soy sauce and simmer for 10 minutes. Add the cooked noodles. Stir well and serve in a large bowl, topped with the scallions and the hardboiled egg if you want.

The Freshest, Coolest Salad You Can Make for Summer or Anytime

Our Fourth of July pot-luck picnic was lovely. Friends gathered in a park opposite the local high school to share a meal and then watch fire...