These are recipes I cherish. Developed over the years, with inspiration from my mom and shared work with my wife, we celebrate Thanksgiving in a year when there is such turmoil in the world. This Thanksgiving, as last year, we will celebrate Thanksgiving at the home of our son Franklin and his fiancée, Lauren. They generously set the table and cook most of the meal. We contribute dishes, to round out what's on the table. Enjoy being with friends and family. Enjoy what is good in your lives. Have a wonderful Thanksgiving. And, please, use the turkey bones to make the most-beautiful-stock-ever!
Thanksgiving was my mother's favorite holiday. She loved the chance to have her family and friends seated around the table, catching up, telling stories, and eating favorite treats.
Most of the time I do the cooking since I work at home and because we have a kitchen the size of a New York closet. Thanksgiving is my wife's day and I happily step to the side, working as a sous chef, assisting her in executing a meal that usually serves between 15-20.
Even though Thanksgiving is a lot of work, the key is organization. Writing up a menu is the first step, then a shopping list, and finally a time-line for the day before Thanksgiving and the day of the meal.
Along with those first steps, we cover the bottom of the oven with aluminum foil so clean up after the meal is easier. Cleaning out the refrigerator makes room for the turkey after we pick it up from the grocery store and so there's space for all those delicious left-overs after the meal.
Besides shopping at the grocery store we visit our local farmers' market to pick up fresh

vegetables for the sides dishes: beets, sweet potatoes, lettuce, celery, carrots, mushrooms, Brussels sprouts, corn, leeks, and onions.
But the most important part of the meal is the turkey and no turkey is complete without a great stuffing.
Corn Bread Stuffing with Sausages, Dried Apricots, and PecansOver the years my wife has developed a crowd-pleasing stuffing with a contrast of textures: soft (corn bread), spicy (sausage), chewy (dried apricots), and crunchy (pecans).
Yield: 15-20 servings
Time: 30 minutes
Ingredients2 boxes corn bread mix
3 celery stalks, washed, ends trimmed, leaves discarded
1 pound mushrooms, brown, shiitake, or portabella, washed, pat dried, finely chopped
2 medium yellow onions, peeled, ends removed, finely chopped
4 garlic cloves, peeled, finely chopped
1 stick sweet butter
1 1/2 cups turkey or chicken stock
4 Italian style sweet sausages
1 cup dried apricots, finely chopped
1/2 cup pecans, roughly chopped
Sea salt and pepper
MethodMake the corn bread the night before and leave the pan on the counter so the corn bread dries out. Use any cornbread mix you like. My wife uses Jiffy. It's inexpensive and tastes great. The instructions are on the box.
Saute the sausages whole in a frying pan with a little olive oil until browned, remove, cut into bite-sized pieces, and set aside. Pour off the excess fat. Add the celery, mushrooms, onion, and garlic into the pan with the stick of butter and saute. Season with sea salt and pepper. Cook until lightly browned, then add stock and summer 15 minutes.
Cut the cornbread into chunks and crumble into a large mixing bowl. Add the apricots, pecans, and the saute. Stir well and set aside until you're ready to stuff the turkey.
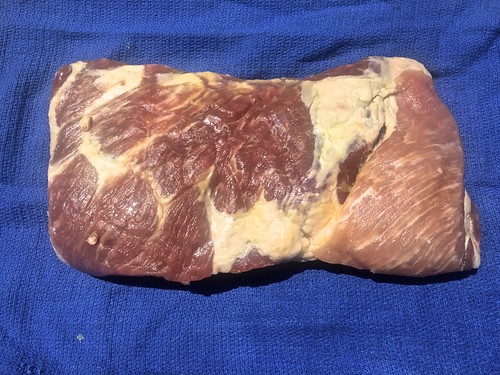
Roast Turkey
The most difficult part about cooking a turkey is size. Even a 15 pound turkey is larger than any roast you'll ever cook, so it's important to have somebody around to help strong-arm the turkey.
The rule of thumb about cooking time is 15-20 minutes per pound at 325 degrees but there are so many variables, you can also use a roasting thermometer and, our preferred method, jiggle-the-leg and if it almost comes off, the turkey's done.
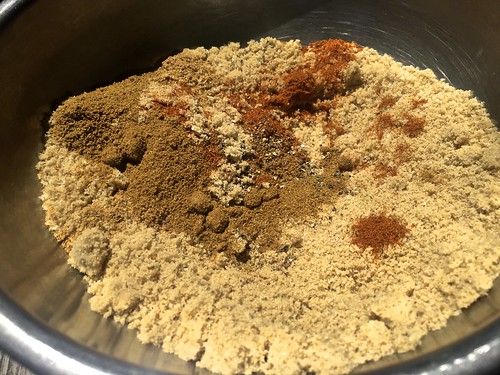
There's a lot of talk about whether to brine or not to brine. In the Los Angeles Times,
Russ Parsons argued for what he calls a "dry" brine, which means salting the turkey inside and out, then wrapping it in a sealable bag and refrigerating it for one to two days.
To prepare your turkey, in addition to the roasting pan, you'll also need pliers. I'm amazed at the work it takes to remove the heavy plastic gizmo that holds the legs neatly in place.
Yield: 20-25 servings
Time: 7-8 hours
Ingredients1 turkey, 23-25 pounds
Olive oil
Sea salt and pepper
MethodUnwrap the turkey. Remove the packet with the liver, neck, heart, and giblet. Use a pair of pliers to remove the piece of wire that holds the legs. It can be a real pain to get the wire off. Wash the turkey inside and out. Pat dry on the outside.
Reserve the liver to make a turkey chopped liver. Put the neck, heart, and giblet into a large saucepan with a lot of water, at least five inches higher than the turkey pieces. Replenish whatever water boils off. Simmer for 2-3 hours or until the meat on the neck falls off if you touch it with a fork. Strain the stock and reserve to use for gravy. Pull the meat off the neck and save to make turkey soup. Use the giblets in the gravy.
Preheat the oven to 450 degrees.
The next step is easier with a friend. Drizzle olive oil on the outside of the turkey. Using your hands spread the oil over the entire bird, front and back. Sprinkle sea salt and black pepper inside the cavity and on the outside.
To put in the stuffing, either my wife or I holds the turkey upright and steady while the other loosely packs the stuffing inside the large cavity, one handful at a time.
Use 8-12 metal skewers and kitchen string to close the large cavity. Carefully turn the turkey over so you can put stuffing into the top area. Use 6-8 skewers and string to close that cavity.
Use any kind of roasting pan. Whether you use a disposable aluminum foil pan or an expensive stainless steel roasting pan from William Sonoma, the result will be the same. The important thing to remember is the pan must be at least 2" wider than the turkey, otherwise as the bird cooks, its juices will drip onto the bottom of your stove and make a mess. To insure that the turkey browns evenly, you'll need a wire rack.
Place the turkey on the rack, breast down and put into the oven. After 30 minutes, reduce the temperature to 350 degrees.
After that, every 30 minutes, baste the turkey with the fat that drips down into the pan. If the skin starts to brown too quickly, put an aluminum tent over the top.
After 3 hours, turn the turkey over. With a large bird this is easier said than done because now the turkey is not only heavy, it's very hot.
Another set of hands is a big help here. My wife and I have choreographed this crucial moment. I lift the roasting pan with the turkey out of the oven, placing it on the cutting board. Michelle stands at the ready with a pot holder in each hand. As I lift the rack with the turkey, she removes the pan. I flip the rack with the turkey onto the cutting board, having first put a kitchen towel along the edge to prevent juices from falling to the floor.
We pour all the juices and fat from the pan into a basting bowl, scrapping off the flavor bits on the bottom of the pan to make gravy.
The rack goes back into the pan. The turkey goes onto the rack, breast side up. After a good basting, the turkey goes back in the oven, covered with an aluminum foil tent.
As the turkey continues to cook, if the wing tips and drumstick ends brown too quickly, wrap them in aluminum foil.
Continue basting every 30 minutes. When the turkey is finished, remove from the oven and let rest 5 minutes.
Carve the turkey on a cutting board, removing the wings first, then the legs, thighs, and the breasts. Either place the pieces on the platter whole, to be carved at the table, or sliced for easy serving. Open the cavities and spoon out the stuffing.
Mushroom-Giblet GravyWhile the turkey is cooking, start the gravy.
Yield: 15-20 servings
Time: 30 minutes
Ingredients2 medium yellow onions, peeled, ends removed, finely chopped
4 garlic cloves, peeled, finely chopped
1 turkey giblet, cooked, grizzle removed, finely chopped
2 tablespoons chopped fresh rosemary, tarragon, or Italian parsley
1/2 pound mushrooms, brown, shiitake, or portabella, washed, finely chopped or sliced
2 tablespoons olive oil
2 cups turkey stock
Sea salt and pepper
MethodSaute the giblet, onions, garlic, fresh herbs, and mushrooms until lightly browned. Add turkey stock and the flavor bits you scraped off the roasting pan, simmer and reduce by 1/3. Taste and adjust the flavors. If too salty, add more stock and a pat of sweet (unsalted) butter.
Reheat before serving.
Turkey StockWhen you're eating Thanksgiving dinner, odds are you aren't thinking about your next meal, but I am. Admittedly, it's a bit obsessive, but before I sit down to join the dinner, all the bones and scraps go into a large pot filled with water. By the time we're clearing the table, the stock is finished.
Turkey stock is rich and flavorful. Perfect for making soups, stews, and pasta sauce, and like chicken stock, freezes beautifully.
Yield: 15-20 servings
Time: 1 hour
Ingredients1 turkey carcass, skin, scraps
Water
MethodPut the carcass into a large pot. If any of stuffing makes it into the pot, all the better for flavor and richness. Cover the bones with water. Simmer 1 hour. Strain and refrigerate. Pick the meat off the bones to use in a soup or stew.
The stock keeps in the freezer for six months.