Showing posts with label Easy to Make Meals. Show all posts

Saturday, October 29, 2022

Soup's On! Easy to Make Squash Soup Sets the Table for Cold Weather

My friend Harriet emailed me."’I'm supposed to bring butternut squash soup to a dinner Sunday. There are SOOO many different recipes, even on the New York Times. Do you happen to have a recipe you love and could share?" 

A few more exchanges and what she wanted became clear. She had already made a vegetable stock from an Otolenghi recipe. She needed to make soup for six people. 

Making soup is easy. Or, less-easy. Depending on some choices. 

Easiest-to-Make Squash Soup

Serves 4-6

Time to prepare: 45 minutes

Ingredients

1 medium sized squash (preferably kabocha or acorn or butternut), 2 pounds, washed, cut into 4 pieces, seeds and fuzzy stuff removed

6 cups homemade stock, vegetable or land animal

1 teaspoon Diamond Brand Kosher salt

Sea salt to taste

Freshly ground black pepper to taste

Directions

The easiest way to make a squash soup (I prefer Kabocha because it has more flavor than most other squash, but that's a personal preference) is to cut the squash into four pieces. Remove the seeds and fuzzy stuff. Place in salted water (only use Diamond Brand Kosher salt because regular salt is iodized and adds a metallic flavor). Boil or steam (steaming is better so the flesh doesn't get water-logged) until the flesh is softened (5-10 minutes). Remove from the water, cool and cut off the skin (and discard).

Then heat the stock (which can be any stock you like, made from vegetables or land animals, your choice). Cut up the cooked squash. Add to the stock in the pot. 

Now you want to combine the squash with the liquid. The easiest way to do that is with an immersion or wand blender. KitchenAid makes a nice one, but other companies make very good ones. 


If you don't have an immersion blender, you should get one, but if there's no time, use a blender. In either case, you want to puree the pieces of cooked squash with the stock. That will take a minute or less.

Heat the soup. Taste and season with sea salt and freshly ground pepper and your soup is guest-ready in less than 30 minutes.

That's the easy version.

The less-easy version adds one step. Not a big step. A little step.

To add flavor, add other vegetables, which you will first sauté with a little olive oil, if the soup is Vegan. If Vegetarian, in olive oil with a little sweet butter (unsalted).

So here are the details.

Less-Easy But Still Really Easy Squash Soup

Serves 4-6 (depending on whether the serving is appetizer or entree size)

Time to prepare: 15 minutes (prep), 30-50 minutes cooking


Ingredients

1 medium sized squash (preferably kabocha or acorn or butternut), 2 pounds, washed, cut into 4 pieces, seeds and fuzzy stuff removed

1 medium onion, washed, peel removed, cut into bite sized pieces

1 garlic, washed, peeled, cut into small bits (optional)

2 large kale leaves, washed, stems removed, cut into bite sized pieces

4 large mushrooms, preferably shiitake but brown mushrooms are good, wash, cut into bite sized pieces

1 large tomato, washed cut into bite sized pieces

6 cups homemade stock, vegetable or land animal

Sea salt to taste

Freshly ground black pepper to taste

1 tablespoon olive oil

1 tablespoon sweet (unsalted) butter (optional)

Directions 

There are two ways to cook the squash. Roasting or salt water steaming. Roasting is an added step but it also adds flavor.

If roasting, place the quartered squash onto a Silpat (non-stick) sheet in a baking sheet. Season with olive oil. Bake in a 350F oven for 20 minutes. Remove. Cool. Cut off the skin (and discard).

If salt water steaming, put 2 cups of water into the bottom of a small pot, season with 1 teaspoon Diamond Brand Kosher salt, bring to a boil, place the squash into a basket or small strainer so the squash sits above the boiling water. Cover and cook 10 minutes. Remove. Cool. Cut off the skin (and discard). If you don't have a basket or small strainer, place the cut up squash into the boiling salted water for 5 minutes. Remove. Cool. Cut off the skin (and discard).

Heat a pot large enough for the soup. Add olive oil and sweet butter (optional). Add vegetables. Stir together. Over a medium flame, sauté 10 minutes until the vegetables soften. If they lightly brown, that's ok.

Add stock and cooked squash.

Simmer 10 minutes.

Blend, either with an immersion blender or by transferring the stock into a blender, until all the vegetables are incorporated. The soup can be either completely smooth or still have bits of vegetables. Your choice.

Simmer 10 minutes. Taste and adjust the seasoning with sea salt and freshly ground black pepper. You can add cream, if you want. Or a bit more sweet butter, if you want.

Serve hot with bread and butter.


Monday, September 21, 2020

Shrimp 101: Easy to Prepare and Delicious

Shrimp are easy to prepare, nutritious and low in fat. Adaptable with many sauces and preparations, their versatility makes them an ideal ingredient in appetizers, soups and main courses. 


To document a meal I made for dinner, I posted a video of shrimps charring on a stove top grill. A friend followed my visual directions but was disappointed with the result. The shrimp were not tasty in the way she expected.

She asked for suggestions. I had a few.

Where to buy shrimp and which shrimp to buy

First off, finding good shrimp isn’t easy. After years of hit or miss sources (sometimes even the most expensive fish market/upscale grocery store would have shrimp that were fresh and sometimes not so fresh), I found a good shrimp in Los Angeles at Ralph’s Market/owned by Krogers.

You probably already know this but always buy shrimp in the shell. If you can find “Ez-Peel” shrimp, that’s good because the back of the shrimp’s shell has already been cut and the back vein already (mostly) removed.

As to size, I prefer medium (31/35 per lb.) sized shrimp. The shrimp at Ralph's are farm raised. Their texture and flavor are very good. Wild shrimp will cost more. When buying from a new-to-you vendor, try different sizes, farmed and fresh shrimp to find what you like. 

When you get the shrimp home, you can peel them or not but rinse them in clean water and refrigerate in an air-tight container.  Use them within 1-2 days. 

When you’re ready to cook them, rinse again. if the shrimp are Ez-Peel, remove the shells with your fingers. If not, run a sharp pairing knife down the back of each shrimp to remove the shells. 

My mother, who lived in Costa Rica and ate a lot of rice there, taught me to put the shells into a small saucepan, cover with water, simmer and strain and save the broth to use in soups and sauces. Very tasty.

Wash the peeled shrimp and remove the black vein that runs along the back.


Rinse again. Now they are ready to cook. Cooking shrimp is very easy. The trick is they cook very quickly.

Salt boiling shrimp

If you want shrimp for a shrimp cocktail or in a salad, heat water in a small saucepan. Use enough water to cover by 1” the amount of shrimp. 

Boil the water. Add a pinch of kosher salt (only kosher salt made by Diamond Crystal because they don’t use additives) or sea salt. 

Add the shrimp. They will cook quickly. Within 20-30 SECONDS. 

Drain and cool by putting ice cubes with the shrimp. Drain. Serve cold or at room temperature or refrigerate in an airtight container.

Grilling or sautéing shrimp

Toss the peeled and deveined shrimp in a bowl with olive oil, sea salt and freshly ground black pepper. 

Using a grill or sautéed pan (cast iron or carbon steel is preferred), place the shrimp individually onto the hot surface. Using tongs, turn them within 5-10 seconds. Cook briefly on each side and remove. 


The grill I use is a stove-top grill that does a great job with easy clean up. And, it is very inexpensive. Here’s a link to the grill on Amazon. 

Grilled shrimp can be served with a chopped vegetable salad (as in the video) or as an appetizer with a cocktail or remoulade sauce.

Shrimp with sauce

Shrimp can be served with any number of cold or heated sauces. My favorite cocktail sauce is a classic. Catsup, lemon juice, capers, grated horseradish and Worcester sauce on the side and Saltine crackers. 

When adding shrimp to curry or a Mexican garlic sauce, add the shrimp just before serving remembering to cook them for only a minute or two to keep them juicy.

Wednesday, May 30, 2018

Eat Twice - Quick and Easy, Vegetable-Chicken Congee-Style Rice Bowl

We've all been there. One hand holds the refrigerator door open as we stare into the brightly illuminated emptiness. We're hungry. We want something that doesn't take much time to prepare.

Where are all the great things to eat? What happened to the chicken and dumplings we made a few days ago? Oh, yeah, we finished that off at lunch. What about the brown sugar pork ribs that were so delicious? The crispy fried chicken? The roasted artichokes? Oh, yeah, all gone.

We could make a salad, but there's no Little Gem lettuce, no arugula, not even Italian parsley. We meant to go to the market. There just wasn't time.


But all is not lost. There's a container of steamed rice we brought home from a meal at the Chinese restaurant. There aren't any leafy greens in the vegetable bin, but there are a few things from last weekend's farmers market. A carrot, an onion, an ear of corn, a dozen English pea pods, a few mushrooms and a bunch of kale.

To make what I have in mind, we need homemade stock. A quick look in the freezer and, yes!, there's a container of chicken stock we made with the left over chicken from the Peruvian restaurant. Maybe our prospects aren't so bleak.

Eat Twice

The key to unlocking this deliciousness is repurposing or more specifically re-imagining what was served up for one meal that can be magically transformed into another.

One of my favorites is a richly flavored rice dish that uses freshly cooked rice or, in the spirit of Eat Twice, rice brought home after a meal at our favorite Vietnamese or Chinese restaurant.

The dish is a cousin of Asian congee, traditionally a soupy, pale white, savory morning bowl of boiled rice mixed with a protein. The version I want you to try is vibrant, colorful and richly layered with flavors and textures.

Use farmers market vegetables to give the dish a crisp freshness. Homemade stock braises the rice to create a comforting creaminess (without using cream).

I always use a mix of vegetables, especially shiitake mushrooms, onions, carrots, broccoli, corn kernels and English peas when they are available. For my pescatarian wife, I use homemade vegetable stock and add tofu or freshly deveined shrimp.

For me, I love a mix of cooked chicken and chopped up shumai, those wonderful pork filled dumplings served as a dim sum dish, or bbq pork sparerib meat cut off the bone and chopped into bite-sized pieces.


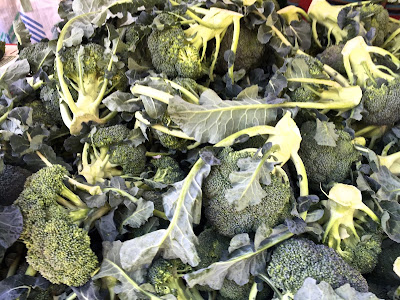
I also like using broccoli leaves. At the farmers market, many people peel off the leaves and leave them on the table. With the farmer's permission, I scoop them up, a treasure waiting to flavor my dishes. The stems should be cut into thin rounds. The leaves should be shredded. They are delicious.

In the summer, I use a medley of warm weather vegetables like corn and English peas. In colder weather, I rely on squash, sturdy leafy greens like kale and broccoli.


Vegetable and Chicken Congee

Convenient and versatile, left-over rice may feel dry to the touch but introduce a hot liquid and the grains plump up and return their former deliciousness.

Use any kind of rice you enjoy except wild rice.

If using freshly cooked rice, the time needed to cook the rice will be much less so add the rice to the simmering broth at the last minute so the grains do not absorb too much liquid and become soggy.

Use any vegetables you enjoy.

Homemade stock is preferable because it will be lower in sodium content and you can control the quality. And, it is less expensive than store bought canned or frozen stock. 

For a vegan version, use vegetables and vegetable broth.

For a spicy version, include 1 cup finely chopped kimchi.

Yield: 4

Prep time: 10 minutes

Cooking time: 15-20 minutes

Total time: 30 minutes

Ingredients

4 cups cooked rice

4 cups stock, preferably homemade

2 cups cooked chicken meat, deboned, roughly chopped

6 leaves kale, washed, pat dried, stems removed, cut into a small pieces or 6 large broccoli leaves, stems finely sliced into rounds, leaves shredded

1 cup broccoli stems and florets, cut into small pieces

1 cup corn kernels (when available)

1 large carrot, washed, peeled, cut into corn kernel sized pieces

1/2 cup shelled English peas, washed (when available)

1 medium yellow onions, washed, peeled, root and stem ends removed, cut into corn kernel sized pieces

6 large shiitake mushrooms, washed, pat dried, tip of the stem removed, thinly sliced

1 tablespoon olive oil

1/4 teaspoon sea salt, ground fine

Pinch freshly ground black pepper

Pinch cayenne powder (optional)

Directions

In a large sauce pan, heat olive oil over medium flame. Add all vegetables. Sauté until lightly brown.

Add stock and chicken. Stir and simmer 10 minutes to combine flavors.


Season with sea salt, black pepper and cayenne (optional).

Add rice. Stir well to combine all ingredients.

Simmer. The cooking time will depend on the rice. If freshly cooked, the time is probably 5 minutes. If the rice needs reconstituting, probably 10 minutes.

Be careful not to overcook because the rice will become soggy.

Serve hot with enough liquid in the bowl that the rice is "wet".

Tuesday, October 3, 2017

Fast, Easy and Delicious Can't-Resist Salmon for a Meal or an NFL Game Day Snack

Eating healthy makes good sense and doesn't have to take a lot of time. One of my favorite dishes is a dry rub roasted salmon that makes its own glaze.

Roasting a salmon filet is perfect for a family meal, NFL game day or a party entree. For a pot-luck dinner last weekend with friends, I  made roasted salmon and a Little Gem lettuce salad with carrots. Healthy, nutritious and delicious and oh so easy.
To get the salmon from refrigerator-to-table, all I needed to do was season the filet with dry rub and place it in the refrigerator. Overnight the mix of sugar, salt and aromatics drew moisture out of the fish. The dry rub turned into a wet slurry that became the base for a sweet-heat savory glaze. 

The filet takes 30 minutes to cook in the oven. The glaze takes 5 minutes to cook in a saucepan.

Because the salmon is best served at room temperature, the dish can be cooked ahead of time and served when everyone is ready to eat. Which makes it ideal to make ahead when you know you will be busy before the meal.

For brunch, the salmon can be served with toasted bagels and cream cheese and with scrambled eggs. For lunch, dinner or watching a football game, add a green salad and pasta and you have an entire meal.

Dry Rub Salmon with Brown Sugar Mushroom Glaze

Adding tomato sauce to the glaze mellows the flavors. You can use canned tomato sauce but making your own will taste much better. Roasted tomato sauce is so easy to make, I would encourage you to make a lot and freeze the sauce in 6 ounce air-tight containers. That way, when you want to make a pasta sauce you will have roasted tomato sauce in the freezer.


Yield 4-6 servings

Prep Time: 10 minutes

Marinating Time: Overnight

Cooking Time: 50 minutes

Total Time: 1 hour + marinating overnight

Ingredients

2 - 3 pounds fresh, skin-on salmon fillet, preferably wild not farm raised, washed

Dry Rub

2 1/2 - 3 cups brown sugar, depending on the size of the filet

1/3 cup kosher salt

1 tablespoon cumin

1/4 teaspoon cayenne (optional)

Glaze

1/4 - 1/2 cup dry rub wet slurry from overnight refrigeration

1 tablespoon extra virgin olive oil

1 tablespoon raw onion, finely chopped

2 tablespoons finely chopped Italian parsley or kale

2 large shiitake or brown mushrooms, washed, pat dried, stem end trimmed, finely chopped

1 large tomato to make 1/4 cup roasted tomato sauce

Sea salt and freshly ground black pepper to taste

Directions

Preheat oven to 500 F. Remove the stem from the tomato. Place the whole tomato on a Silpat sheet or parchment paper on a baking tray.
Roast 20 minutes. Transfer the tomato and any juices from the baking tray into a food mill or a fine mesh strainer. Press the tomato to collect the juices and pulp. Reserve skin and seeds to make vegetable stock or discard. Set tomato sauce aside or refrigerate in an air-tight container. The sauce can be frozen if made ahead.
Inspect the filet and remove any bones. Trim off small fins if there are any and discard. Pat dry.

In a bowl, mix together the dry rub seasoning.

Measure a piece of plastic wrap that it is longer than the filet by 5" on all sides. Lay the plastic wrap on a flat surface.

Spread half the dry rub on the plastic wrap. Lay the salmon filet on top, skin side down. Spread the remainder of the dry rub on the salmon.

Fold over the ends of the plastic wrap so the salmon and dry mix are pressed against each other.  Put the package into a plastic bag and seal.

Place the plastic bag on a baking sheet in case of leaks. Refrigerate.

The next day, remove the salmon filet. The dry rub will have become a wet slurry.

Preheat the oven to 400 F.

To make the glaze, place the bag in a bowl. Remove the salmon from the plastic bag and plastic wrap being careful to capture all the liquid. Use your hand to scrape off any dry rub that clings to the filet or the plastic wrap. Mix together any remaining dry rub and the wet slurry.

Line a baking tray with aluminum foil and place a small wire rack on top of the aluminum foil. Place the salmon filet on the wire rack, skin side down. Place in the oven.

In a small sauce pan, heat olive oil and sauté onion, mushrooms and Italian parsley or kale until lightly browned. Add dry rub slurry and roasted tomato sauce. Mix well. Simmer 5 minutes. Set aside.
After the salmon has been in the oven 20 minutes, remove. Place a generous amount of the glaze on top and return to the oven another 10 minutes. Reserve any extra sauce.
Remove from the oven. When the salmon is cool enough to touch, use a pairing knife to help remove the filet from the wire rack. Keep the skin on the filet.  When transferring the salmon to a decorative plate, be careful not to disturb the toping.

Serve at room temperature with the extra sauce in a small bowl.

Sunday, April 2, 2017

Ugly Tomatoes Make Beautiful Meals

In the winter or spring farmers markets, you've passed them by with a disapproving look. Blemished fresh tomatoes. Discounted to a dollar or less, these unhappy looking suitors for your attention appear destined to become compost.
Occasionally you will see someone who has stopped at the bin looking through the misshapen mound and you probably think they are too poor to buy the perfectly red, perfectly shaped tomatoes grown in a hot house.

The truth is, there are treasures hidden there. Find tomatoes that are firm and only slightly blemished and you will have found diamonds in the rough. They lack summer's full-blasted brightness. but tomatoes grown during winter and spring's weaker sun grow thicker skins and develop a rich, deep umami flavor.
Oven roasted, these tomatoes find sweetness hidden deep within. The acid so prized in summer tomatoes is mellowed and sweetened in off-season farmers market tomatoes.

But treat these tomatoes with care. Brought home from the farmers market and left on the kitchen counter in the sun, they will quickly soften and turn bad. They are used to cold, so place them in the refrigerator and they will last days and even a week until you are ready to use them roasted as a side dish for braised meat, tossed with pasta, served on steamed rice or mixed into soups, stews and braises.

Roasted Winter/Spring Tomatoes

Check each tomato carefully. You want firm tomatoes. A few blemishes are ok because those can be easily removed with a sharp pairing knife. 

Heirloom tomatoes are especially flavorful.

Summer tomatoes can be roasted with a similar but different result. 

Serves 4

Time to prepare: 10 minutes

Time to cook: 30 minutes

Total time: 40 minutes

Ingredients

3 pounds tomatoes

1 medium yellow onion, washed, skins, root and stem ends removed and discarded

1 tablespoon olive oil

1/4 teaspoon sea salt

Freshly ground black pepper to taste

1 tablespoon Italian parsley, leaves only, washed, finely chopped

Directions

Preheat oven to 400F.

Prepare a baking tray with a small lip (about 1/2"). Lay a Silpat (non-stick silicone) sheet or a piece of parchment paper onto the bottom of the baking tray.
Using a sharp pairing knife, remove the stem and spot on the bottom where the blossom was attached. Remove any dark blemishes and discard.

Cut into 1" slabs. Place slabs onto the prepared baking tray.

Cut onion in half, cutting from top to bottom. Cut thin slices by cutting from top to bottom. Place in mixing bowl. Season with olive oil, sea salt and freshly ground black pepper. Mix with Italian parsley.

Spread onion-parsley mixture over tomatoes.

Place baking tray into oven.

After 15 minutes, using a spatula or flipper, turn the slabs over. Keep onion-parsley mixture on top to brown. Return to oven.

Remove after 15 minutes.

The onion-parsley mixture should have lightly browned. Carefully remove the slabs which are now very delicate from the pan. Reserve the onion-parsley mixture and all of the liquid that has accumulated in the pan. This is full of tomato-essence
flavor.

To use as a side-dish, reheat and serve in a bowl. The roasted tomatoes are delicious when added to soups, stews and braises.

If not used immediately, keep the roasted tomatoes in an air-tight container. They will keep in the refrigerator for several days or in the freezer for a month.

Friday, March 24, 2017

Best Ever Pasta With a Secret Ingredient

The holy grail of home cooked meals is a dish that takes practically no time to make, the ingredients are inexpensive and the results are delicious.

I found a pasta dish that fits all of those criteria.

The ingredients are basic. Olive oil, tomatoes, onions, mushrooms and a green vegetable like asparagus. The seasoning is straight forward, just a little sea salt, black pepper and, if you like, a pat of sweet butter. By the time the pasta is al dente, the sauce is finished.
Anchovy filets are the special ingredient that creates an extraordinarily delicious pasta.

If you have enjoyed spaghetti alla puttanesca in an Italian restaurant, my recipe is similar but with more delicate flavors.

Even people who don't like anchovies by themselves fall in love with this sauce because the anchovies dissolve, binding together all the flavors. The result is an earthy, deeply satisfying dish.

Anchovies, a gift from the sea

Anchovies are a ubiquitous ingredient in Mediterranean cuisines. Stop in a neighborhood cafe in Northern Spain, as I did in the cathedral town of Burgos, and you will certainly have a tapas with an anchovy filet skewered along with a pepper, pickle and an olive or two. Those delicious filets are front and center on the dish, displayed in all their fish-filet-glory. With an espresso or an ice cold glass of beer, nothing is better for an afternoon snack.
Use high quality Spanish or Italian anchovies preserved in oil. Do not use salt preserved anchovies, ones wrapped around capers or filets with skin. 
Anchovies are sold in 2-4 ounce tins or glass jars. buy anchovies in larger quantities like Flott's 28 ounce tin. That way I always have them in the refrigerator to add to deviled eggs or tapenade. Kept in an airtight container and submerged in oil, the anchovies will keep for months.

Best Ever Pasta Sauce

Use a quality pasta like De Cecco or, if available, fresh pasta.  For this dish, I prefer a medium weight pasta like spaghetti, pappardelle, ziti, orecchiette or penne.  

Chopped fresh tomatoes can be used, but they are not as flavorful as roasted tomatoes which have an earthy sweetness. 

Roasted tomatoes can be prepared ahead and kept refrigerated in an airtight container for up to three days or frozen for up to three months. 
During the winter at the Santa Monica Farmers Market, there are still farmers who bring tomatoes to market. Sold at a deep discount because they are misshapen and cracked. These "ugly" tomatoes are beautiful inside. With a little care and the discolored parts cut away, a roasted winter tomato has a delightful, deep-flavored sweetness.

To add crunch and visual contrast, add a lightly cooked green vegetable. Depending on what is available I use green beans, asparagus or broccoli greens. 

Serves 4

Time to prepare and cook: 15 minutes

Ingredients

1 pound pasta, a quality brand or fresh
1 tablespoon kosher salt
10-16 anchovy filets depending on taste 
2 tablespoons extra virgin olive oil
1 whole large tomato, washed, pat dried, stem and any blemished skin cut away
1 pound asparagus stalks, washed, stem ends snapped off
1 small yellow onion, washed, root and stem ends and outer skin removed, chopped into large dice
1 cup brown, shiitake or Chanterelle mushrooms, stems trimmed, dirt removed, lightly washed and pat dried, thin sliced top to bottom
1 tablespoon sweet butter (optional)
Pinch cayenne powder (optional)
1/4 cup chopped Italian parsley, washed, pat dried, leaves only, finely chopped for garnish
1/4 cup freshly grated Parmesan or Romano cheese
Sea salt and freshly ground black pepper to taste

Directions

Preheat oven to 450F.

Cut tomato into 3 large, round slices. Line baking sheet with Silpat or nonstick sheet. Place tomato slices on sheet and place in oven. Cook 10 minutes. Remove from oven. 

Place large pot on stove filled with water to within 4" of the rim. Add kosher salt. Bring to boil. 

Cut asparagus stems into 1/4" rounds. Leave the last 2" of stem attached to the spear. Set aside.

Heat 1 tablespoon olive oil in large frying pan on medium flame.

When the salted water boils add pasta. Stir well and stir every 3 minutes for even cooking. Do not cover. Place a colander in the sink next to a heat-proof measuring cup.

Sauté onions until translucent in the heated oil. Add mushrooms and asparagus. Stir well and sauté 3-4 minutes.

Push vegetables to one side of the frying pan to clear space for the anchovy filets. Add another tablespoon olive oil. Allow 1 minute to heat. Using a sturdy fork, gently stir the anchovies into the heated oil until they dissolve. Toss the vegetables in the sauce. 

Tear apart the tomato slices. Add the bits and pieces and all of the accumulated oils from the baking sheet into the sauté pan. Add sweet butter (optional) and a pinch of cayenne powder (optional). Stir to melt butter. Toss well to integrate the sauce and coat the vegetables.

Taste pasta after 10 minutes to confirm it is al dente. When you strain the pasta in the colander, capture 1 cup of pasta water in a heat-proof cup.

To prevent sticking, toss pasta.

Just before serving, transfer pasta into frying pan. Separate any that are sticking together. Toss to coat with sauce. If a little more sauce is needed, add 2 tablespoons pasta water and toss. Add more pasta water if more sauce is desired and stir.

Transfer pasta into serving bowl. Top with finely chopped Italian parsley and serve with freshly grated cheese on the side.


Saturday, October 15, 2016

Quick and Easy Mac & Cheese Goes Au Naturel

I remember the "blond" stage of cooking for our sons. White bread, spaghetti with butter and that store-bought, powdered flavorless Parmesan cheese and, of course, Mac & Cheese. We kept boxes of Kraft Mac & Cheese in the pantry so we could make the boys food whenever they wanted.

Once they graduated from high school and left for college, we stopped making Mac & Cheese. A few months ago, I was cleaning out the pantry and found a box pushed way to the back. I think it expired in 2007.

Last week we were invited to a pot luck dinner party. For no reason in particular, the dish we were to bring was Mac & Cheese.
As classic American dishes have gotten make-overs in the past decade, restaurants now serve Mac & Cheese with lobster, Dungeness crab, shrimp, truffles, artisanal cheeses, blue cheese, heritage bacon, gruyere béchamel sauce and gluten free pasta.

For the dinner party I wanted to make a Mac & Cheese that was close to the comfort food we served the boys with a few "adult" touches, but not so many that the dish lost it's identity.
I prepared the Mac & Cheese two ways. One, with charred shallots and kale added for color and texture. The second, I added slow roasted Roma tomatoes and thin sliced shiitake mushrooms along with the shallots and kale.

Mac & Cheese Au Naturel

To be "comforting," Mac & Cheese needs hot fats. Cheese alone won't be smooth enough, so I added heavy cream, whole milk and sweet butter. Not very dietetic but it tastes good. Serve the Mac & Cheese with a tossed green salad and fresh fruit for dessert and the calories will balance out.

For the cheese, use whatever kind you like. I used Kerrygold white cheddar and that worked well.

Serves 4

Time to prep: 20 minutes

Time to cook: 20 minutes

Total time: 40 minutes

Ingredients

1/2 pound small macaroni pasta
1/2 cup whole milk
1/4 cup heavy cream
1 tablespoon sweet butter
1/2 pound good quality white cheddar, shredded
1 cup kale, preferably curly green or purple Lacinato, washed, pat dried, leaves removed from rib and thin sliced
2 tablespoons shallots or 1/2 small yellow onion, washed, pat dried, skin and ends removed, thin sliced
1/2 cup homemade bread crumbs
2 large Roma tomatoes, washed pat dried (optional)
1/2 cup shiitake, brown or portabella mushrooms, washed, pat dried, thin sliced (optional)
1 tablespoon kosher salt
1 tablespoon canola oil
Sea salt and black pepper to taste.
Pinch cayenne pepper (optional)

Directions

1. If using Roma tomatoes (optional), preheat oven to 200F. Cut each tomato in half, slicing from top to bottom. Place on a baking sheet lined with a Silpat sheet or parchment paper. Place in oven. Roast eight hours. Remove. Let cool. Remove and discard skins. Refrigerate until ready to use.
2. Bring 1 gallon water with kosher salt to a boil. Add pasta. Stir well. Cook 8 minutes. When draining pasta, reserve 1 cup salted pasta water. Toss pasta and set aside.

3. Place a carbon steel pan or a sauté pan that can take high heat (not a non-stick pan) on the burner. Char the shallot or onion slices in a few drops of oil. Remove when edges are blackened being careful not to burn. Remove. Set aside. Do the same with the kale. Char but do not blacken. Remove. Set aside. If using mushrooms (optional), add a few drops of oil to the hot pan. Char but do not blacken. Remove. Set aside.

4. Melt butter in carbon steel or sauté pan. Add milk and heavy cream. Stir well. Season with sea salt and black pepper to taste.

5. Pre-heat oven to 350F.

6. Break apart cooked macaroni and add to pan. Stir well to coat. Simmer 5 minutes.

7. Add charred shallots or onions and kale. Stir well. If using slow roasted Roma tomatoes, fine chop and add to pasta along with charred mushrooms.

8. Transfer cooked pasta to large bowl. Add shredded cheese. Toss well. If more sauce is desired add 1/4 cup pasta water, remembering that it is salty so use sparingly.

9. Transfer to decorative baking dish. Top with bread crumbs. Bake 20 minutes or until cheese is gooey and bubbling. Serve hot.


Pickle Me Up! It's Thanksgiving!

Pickles are delicious anytime of the year. For Thanksgiving they are especially good. Their crunch and acidity counterbalances the delicious...